Table of Contents
Edited Sep 06, 2023: Jekyll has created an article on how to use GitHub Actions to deploy Jekyll sites to Github. You can view the article at https://jekyllrb.com/docs/continuous-integration/github-actions/.
![]()
Since I have been playing with Github Pages to host my own website, I notice although there is a lot of automation out of the box to host the static website, Github only supports a few jekyll dependencies. This makes it restricting when you want to use a custom Jekyll gem or your own plugin. After doing a bit of research, I have figured out a way to also enable automatic deployment of your own site while also has the ability to use your own dependencies not supported yet by Github Pages. One of the ways is to use CircleCI for automatic build and deployment of your static site to your Github Pages repo.
Note: this tutorial assumes that you already know how to host your static site on Github Pages. Otherwise, you can check out some guides available on Github.
CircleCI
CircleCI is a very powerful continuous integration tool, which allows rapid builds and deployment of your projects. Open source projects are supported and get free builds so as long as your static website is located on a public repository on Github, you won’t have to pay anything to use it. CircleCI also supports one job build for private project so you can also use it for your personal private project.
Deploy to Github Pages with CircleCI
The first step is to grant CircleCI access to your repo. This is done by adding a deploy key to allow read and write access so that CircleCI can read and push your changes. You can find out how to do it here
Next step is to configure the build and deployment step so CircleCI knows what to do
Create .circleci/config.yml:
version: 2
jobs:
  deploy:
    docker:
      - image: circleci/ruby:latest
        environment:
          USER_NAME: YOUR GITHUB USERNAME
          USER_EMAIL: YOUR EMAIL
    steps:
      - checkout
      - run:
          name: install dependencies
          command: |
            gem update --system
            gem install bundler
      - restore_cache:
          keys:
            - v1-gem-cache-{{ arch }}-{{ .Branch }}-{{ checksum "Gemfile.lock" }}
            - v1-gem-cache-{{ arch }}-{{ .Branch }}-
            - v1-gem-cache-{{ arch }}-
      - run: bundle install --path=vendor/bundle && bundle clean
      - save_cache:
          paths:
            - vendor/bundle
          key: v1-gem-cache-{{ arch }}-{{ .Branch }}-{{ checksum "Gemfile.lock" }}

      - run: JEKYLL_ENV=production bundle exec jekyll build
      - run:
          name: Test
          command: bundle exec htmlproofer ./_site --check-html --disable-external --empty-alt-ignore
      - deploy:
          name: Deploy Release to GitHub
          command: |
            if [ $CIRCLE_BRANCH == 'source' ]; then
              bash .circleci/deploy.sh
            fi
workflows:
  version: 2
  build:
    jobs:
      - deploy:
          filters:
            branches:
              only:
                - source
The config.yml file declares the steps for CircleCI to execute, you can see that we are telling CircleCI to checkout the repo, update bundler, restore gems cache, run bundle install , save gems cache, build the static site by executing JEKYLL_ENV=production bundle exec jekyll build and finally if the code is pushed to source branch, the script deploy.sh is executed.
Create .circleci/deploy.sh:
git config user.name "$USER_NAME"
git config user.email "$USER_EMAIL"

git checkout master
git pull origin master

find . -maxdepth 1 ! -name '_site' ! -name '.git' ! -name '.gitignore' ! -name '.circleci' -exec rm -rf {} \;
mv _site/* .
rm -R _site/

git add -fA
git commit --allow-empty -m "$(git log source -1 --pretty=%B)"
git push -f origin master

echo "deployed successfully"
Here we are telling CircleCI to checkout the master branch of the repo. For personal website, Github Pages uses master branch to render the site. By default, Github Pages will build the site and use the contents under _site directory to render the site. However, since we are using CircleCi to build the site, we just have to copy all the contents under _site that have already been built and put them in the root directory, that way Github Pages can render the contents.
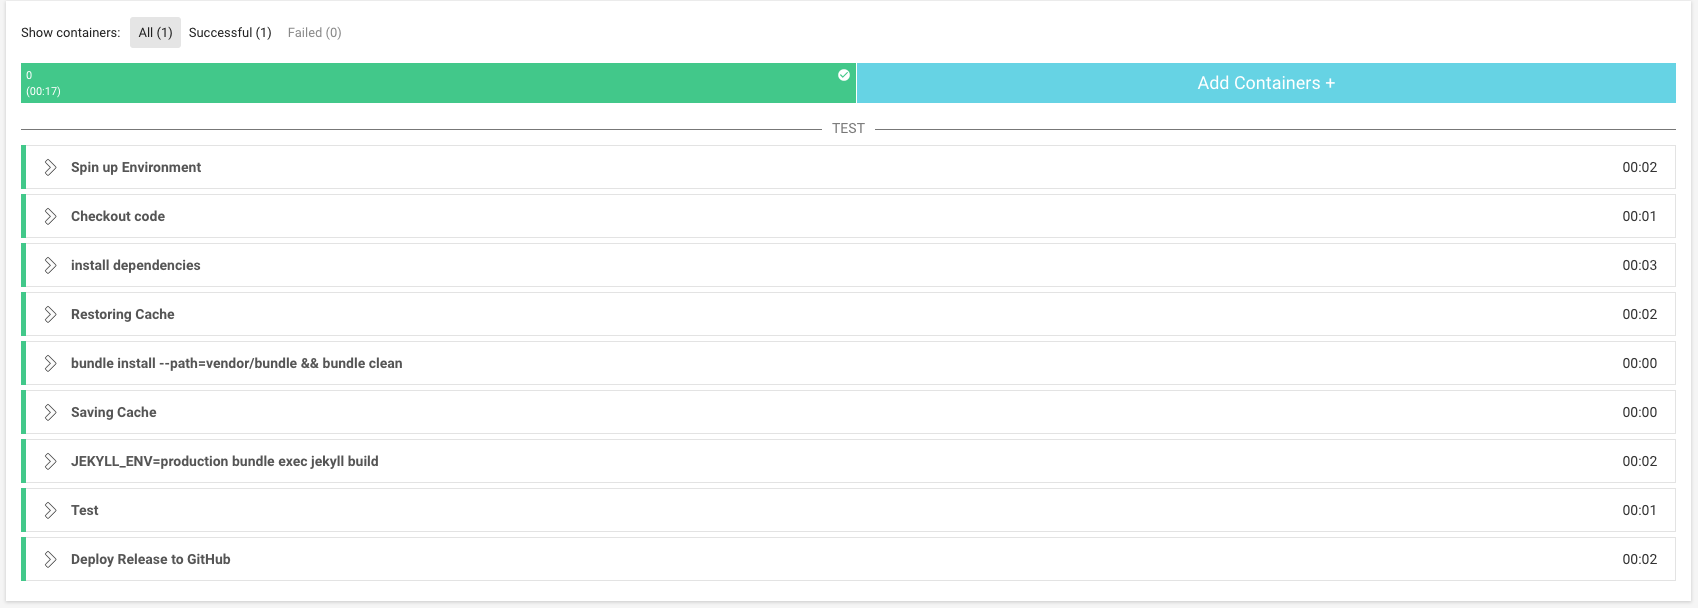
After you have created these files, commit and push the changes to source branch. You will see a new build will start in CircleCI, which will execute all the steps mentioned above and put the new changes of your site on master branch. You may see something similar to this on CircleCI:
Once it’s done, your changes will be available for viewing.
Added benefit: Custom Jekyll Dependencies + Plugins
As I mentioned, if we let Github Pages handle the build of our site, only a limited number of dependencies and plugins are supported. However, now we have switched to CircleCI and build the site ourselves, this comes with an additional benefit which is all the Jekyll dependencies and plugins are now supported. Some of you may be aware that jekyll-paginate-v2 is not yet supported by Github Pages, but now you can take advantage of the new additional features of this dependency.
Addendum
If you decided to create a separate repo to store your source code and want to use CircleCI to push the generated static site to your Github Pages repo, you can replace the .circleci/deploy.sh above with the following content:
git config --global user.name "$USER_NAME"
git config --global user.email "$USER_EMAIL"

export COMMIT_MESSAGE=\"$(git log --format=oneline -1 --pretty=format:'%h - %B')\"

echo $COMMIT_MESSAGE

git clone $GITHUB_PAGE_REPOSITORY_URL destination
cd destination

git checkout master
git pull origin master

find . -maxdepth 1 ! -name '_site' ! -name '.git' ! -name '.gitignore' -exec rm -rf {} \;
mv ../_site/* .

git add -fA
git commit --allow-empty -m "$COMMIT_MESSAGE"
git push -f origin master

echo "Deployed successfully"
In your repo setting on CircleCI, add a new environment variable GITHUB_PAGE_REPOSITORY_URL which is your Github Pages repo URL.